
How to Get the Perfect Bike Fit for Better Comfort and Performance
As someone who spends a lot of time on the bike, one of the most important lessons I’ve learned is that comfort is key to enjoying long rides. Over the years, I’ve realized that even a small tweak to my bike setup can drastically improve my cycling experience. From my saddle height to the handlebar position, every adjustment makes a difference. If you’re struggling with discomfort or inefficient rides, it might be time to focus on achieving the perfect bike fit. Here's my step-by-step guide on how to adjust your bike for the best possible fit.
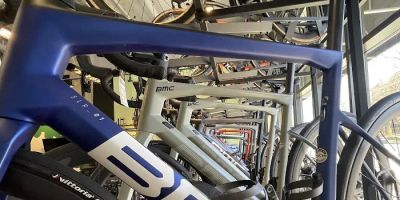
Conte's Bike Shop
3449 Wilson Blvd, Arlington, VA 22201, USA
Why Proper Bike Fit Matters
We all know how frustrating it can be when something doesn’t feel right. Whether it’s numb hands, sore knees, or aching lower back, these issues can significantly impact your cycling enjoyment. After my first long ride with a poorly adjusted bike, I quickly realized how important proper fit was for not just comfort, but also performance. A bike that fits you well ensures that you’re able to ride longer without pain, avoid injuries, and pedal more efficiently. When your bike is adjusted to suit your body and riding style, you can focus on the road (or trail) instead of your discomfort.
Adjusting your bike isn’t just about comfort, though. It also enhances your performance. A well-fitted bike allows you to exert more power with less effort, improving your speed and endurance. With the right setup, you’ll also have better control, which is crucial whether you're on a road bike, mountain bike, or a hybrid bike.

Bicycle Barn LLC
839 Reading Rd, East Earl, PA 17519, USA
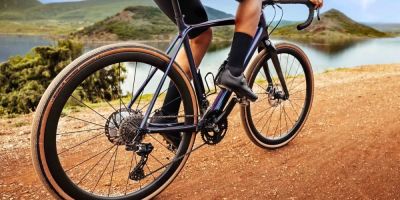
Step 1: Adjusting the Saddle Height
The first thing I always tackle when adjusting my bike is the saddle height. If your saddle is too high or too low, you’ll notice discomfort during your ride, and you might even develop aches or injuries over time. Setting the correct saddle height is crucial for your pedaling efficiency and overall comfort.
To get the right height, start by sitting on the bike with your feet on the pedals. Pedal backward and check the position of your legs. Ideally, when your pedal is at the lowest point, your leg should have a slight bend in the knee. If your knee is fully extended or too bent, you’ll need to make adjustments.
If the saddle is too low, it’ll cause your legs to be cramped, which can lead to knee pain. If it’s too high, you’ll overextend your legs, which can strain your hips and lower back. Adjusting the saddle is easy; just use the quick-release lever or the bolts on your saddle clamp to raise or lower it. Once it’s in the right position, take a short ride to see how it feels.
Step 2: Fine-Tuning the Saddle Angle
While saddle height is crucial, saddle angle also plays an important role in comfort. I’ve found that a slight tilt can make a huge difference. A saddle that’s tilted too far forward or backward can cause unnecessary pressure on certain areas, leading to discomfort during long rides.
To adjust the angle, loosen the bolts holding the saddle in place, and tilt the saddle slightly forward or backward. Generally, your saddle should be level, but some riders prefer a slight tilt depending on their body structure. If you’re riding long distances, a slight tilt forward can relieve pressure on the perineum area, but be cautious not to go too far, as this could cause discomfort in your hands and wrists.
Step 3: Handlebar Height and Reach
Now that your saddle is in a good position, it’s time to focus on the handlebars. The height and reach of your handlebars play a major role in the comfort and control you have over the bike. I’ve found that handlebar position adjustments can greatly improve my posture and prevent neck and back pain.
Start by adjusting the handlebar height. If you’re riding a road bike, lower handlebars tend to provide a more aerodynamic position, but they can also lead to back pain if they’re too low. For comfort, I prefer handlebars that are level with my saddle or slightly higher. For mountain bikes or hybrids, handlebars are typically higher, which gives a more upright and relaxed riding position.
Once the height is set, you’ll need to adjust the reach. To do this, ensure your handlebars are aligned with your saddle. You should be able to reach the handlebars comfortably without overextending your arms. If you feel too stretched out, consider moving your handlebars closer. Conversely, if you feel cramped, adjust them further away. These adjustments help prevent arm and shoulder fatigue during longer rides.
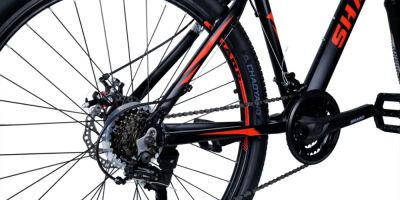
Step 4: Pedal and Cleat Positioning
Another crucial adjustment is the positioning of your pedals and cleats. If you ride with clipless pedals, getting the cleats positioned correctly can make a huge difference in your comfort and pedaling efficiency. I learned the hard way that improperly aligned cleats can cause knee pain or discomfort during long rides.
Start by positioning the cleats on your cycling shoes in a way that allows your feet to align naturally with the pedals. The general rule is that the cleat should be positioned so that the ball of your foot sits over the pedal spindle. I always make small adjustments to ensure that my knees track straight while pedaling, as improper cleat alignment can cause issues with knee tracking and lead to pain.
Step 5: Handlebar Reach and Grip
As you adjust the position of your handlebars, don’t forget about your grip. The type of handlebars you have will influence the way you grip them. If you’re using drop bars, you’ll want to make sure that your hands can comfortably reach all the positions, whether you’re in the hoods, drops, or tops. If you’re on flat bars, I recommend checking that the grips feel comfortable for your hands and wrists, preventing numbness or tingling.
If you’re spending a lot of time riding, I’ve found that ergonomically designed grips can make a big difference in preventing fatigue. You might want to experiment with different grip options or bar tape to find the right level of cushioning and support.
Step 6: Test Ride and Final Adjustments
Once you’ve made all your adjustments, it’s time to go for a test ride. I always recommend doing this in a safe area, such as a quiet road or a park, so you can assess how your bike feels. Pay attention to any discomfort or awkward positioning during the ride. If something doesn’t feel right, make small tweaks and ride again until you’ve found the perfect setup.
It’s important to remember that bike fitting isn’t a one-time thing. Over time, your flexibility, riding style, and even the type of cycling you do may change, requiring further adjustments to keep your bike comfortable and efficient. I’ve found that regular fine-tuning keeps me at my best.