Understanding Your Bike’s Gear System
When I first started cycling, one of the most confusing aspects was figuring out how to adjust the gears. My bike’s gears were either too tight, too loose, or just plain unresponsive, leading to a frustrating ride. But over time, I realized that adjusting your bike’s gear shifting doesn’t need to be a mystery. In fact, it’s a straightforward process once you understand the mechanics behind the system.
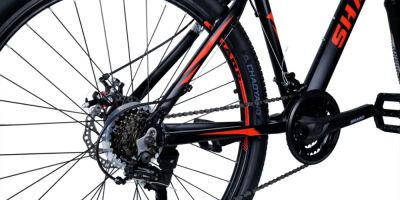
Your bike’s gear system consists of two main parts: the front derailleur and the rear derailleur. These components control how the chain moves between different gears, allowing you to shift and change your speed and resistance. The front derailleur handles the chain shifting between the chainrings at the front, while the rear derailleur moves the chain across the cassette at the back of your bike.
Conte's Bike Shop
3449 Wilson Blvd, Arlington, VA 22201, USA
Why Gear Shifting Matters
Getting your bike’s gear shifting dialed in is crucial for a smooth and enjoyable ride. A bike with poorly adjusted gears can cause slipping, uncomfortable pedaling, and reduced efficiency. The proper gear shifting allows you to transition smoothly between gears, ensuring you have the right amount of resistance for your speed and terrain.
Whether you're cruising through the city streets or tackling a steep mountain trail, proper gear shifting can make a world of difference. On top of that, correctly adjusted gears can save you energy, prevent chain wear, and enhance your overall cycling experience.

Bicycle Barn LLC
839 Reading Rd, East Earl, PA 17519, USA
Common Gear Shifting Problems
Before diving into how to fix these issues, it's important to recognize some common gear shifting problems. I've encountered a few of these myself, and trust me, they can be a real headache if left unaddressed:
- Skipping Gears: This occurs when the chain doesn’t engage the correct gear or jumps unexpectedly. It can be caused by loose cables or a worn-out derailleur.
- Sticking Shifts: If your gear lever feels stiff or gets stuck while shifting, it could be a sign of a misaligned derailleur or a problem with the cable tension.
- Chain Drops: The chain can sometimes fall off the front or rear cassette during shifting. This might happen if the derailleur is not properly aligned with the gears or if the chain is too loose.
Step-by-Step Guide to Adjusting Your Bike’s Gears
Now, let’s get to the good stuff! I’m going to walk you through the process of adjusting your bike’s gear shifting. This is a DIY job that only takes a few tools and some patience, but trust me, it’s worth it for the peace of mind and smooth ride.
1. Prepare Your Bike and Tools
Before making any adjustments, make sure your bike is clean and properly positioned. Place it on a repair stand if you have one, or turn the bike upside down. You’ll need the following tools:
- 2mm or 5mm Allen wrenches (depending on your bike’s components)
- Philips screwdriver
- Bike lubricant
- Cleaning supplies (brush and cloth)
Once your bike is ready, inspect the drivetrain for any visible damage, dirt buildup, or loose parts. Clean off any debris before starting adjustments to avoid any interference during the process.
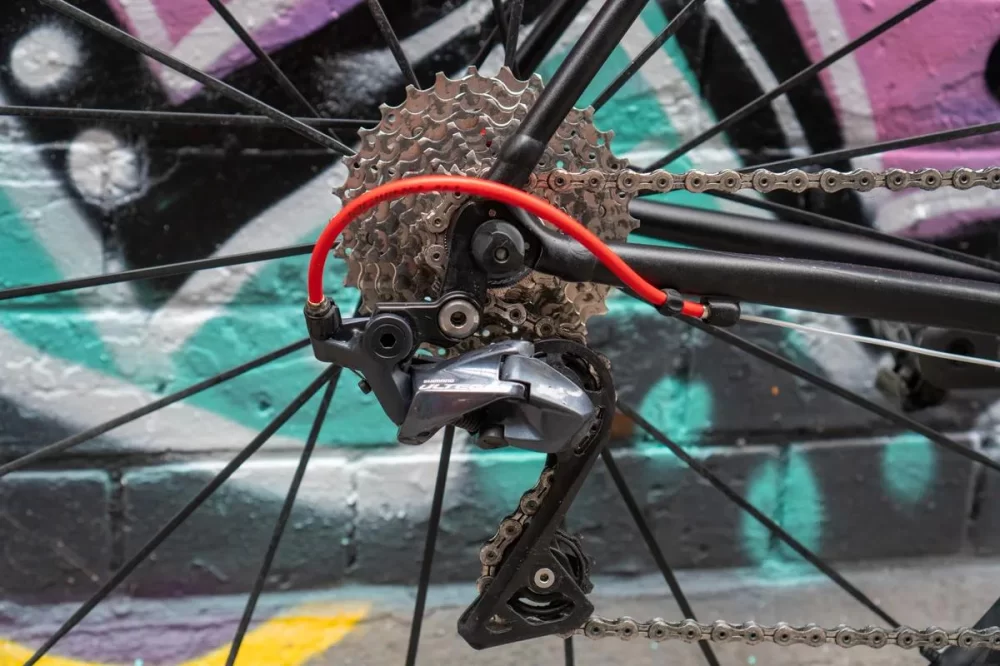
2. Checking the Derailleurs
The first step in adjusting your bike’s gears is ensuring that the derailleurs (both front and rear) are correctly aligned. If they’re out of place, you’ll have difficulty shifting smoothly.
Start with the rear derailleur. Shift your bike to the smallest gear (front and rear) and check if the derailleur is straight. If it’s crooked or rubbing against the cassette, you may need to adjust its position using the derailleur hanger or the screws that control its alignment.
Next, do the same for the front derailleur. Shift the bike to the smallest chainring in the front and inspect the alignment. The derailleur should be parallel to the chainring and positioned just above the largest gear on the cassette.
3. Adjusting the Derailleur Tension
Once you’ve checked the alignment, the next step is to adjust the tension on the derailleur cables. To do this, locate the barrel adjuster on your bike’s frame or near the derailleur. This tool allows you to make small adjustments to the cable tension without having to remove the cables entirely.
To tighten the cable (if the derailleur isn’t shifting into higher gears), turn the barrel adjuster counterclockwise. If the derailleur is skipping gears or shifting too slowly, loosen the cable by turning the barrel adjuster clockwise. Be sure to make small adjustments and test the shifting after each turn.
4. Adjusting the Limit Screws
Limit screws are small screws located on the derailleur that prevent the chain from shifting beyond the intended gear range. These screws help avoid the chain falling off the gears completely or interfering with other components.
For the front derailleur, adjust the limit screws to ensure the chain stays on the chainring while shifting. For the rear derailleur, adjust the high and low screws to prevent the derailleur from shifting too far either towards the small or large cog on the cassette.
5. Test Ride and Fine-Tune
After making all the necessary adjustments, it’s time to take your bike for a test ride. Shift through all the gears and see how the bike responds. If there’s any hesitation or difficulty shifting, make small adjustments to the tension or limit screws as needed.
Sometimes, it may take a few rounds of tweaking to get everything just right. Don’t get discouraged if it’s not perfect the first time. The more you work with your bike’s gear system, the more familiar you’ll become with how it responds to adjustments.
Tips for Maintaining Your Bike’s Gears
Keeping your bike’s gears in top shape requires regular maintenance. Here are some tips I’ve learned to keep my gear system functioning smoothly:
- Clean your chain regularly: A dirty chain can cause poor shifting performance. Clean your chain every few rides to remove dirt, oil, and debris.
- Lubricate your derailleur: Apply lubricant to the derailleur pivots and chain regularly to ensure smooth movement.
- Check cable tension: Over time, cables can stretch or become loose. Periodically check and adjust the tension to maintain optimal shifting performance.
With these simple maintenance steps, you’ll keep your bike shifting like new for years to come. Don’t forget that gear adjustment is not just about fixing problems, but also about keeping your ride comfortable and efficient!
Remember, your bike is your trusty companion on every ride. Taking care of its gear system will ensure you have a smooth, enjoyable, and safe cycling experience every time you hit the road.