Mastering Basic Mountain Bike Repairs: A Rider’s Guide to Self-Sufficiency
As a passionate mountain biker, I’ve learned that keeping my bike in tip-top shape is essential for a smooth and enjoyable ride. Over the years, I’ve come across various situations where I had to quickly fix my bike in the middle of a trail, and being able to handle basic repairs has saved me more than once. Whether you’re a seasoned rider or just getting started, knowing how to perform simple repairs on your mountain bike can make a huge difference in your riding experience.
In this guide, I’ll walk you through some of the most common basic mountain bike repairs that every rider should know. From fixing a flat tire to adjusting the gears, these skills will help you stay on track, even when you’re out on a trail far from home. Trust me, there’s no better feeling than being able to solve a problem on your own, especially when you’re miles away from the nearest bike shop.
Conte's Bike Shop
3449 Wilson Blvd, Arlington, VA 22201, USA
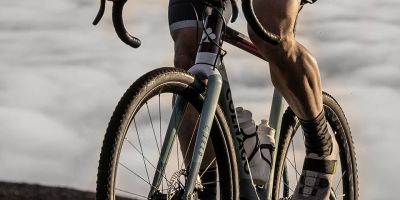
1. Fixing a Flat Tire: The Most Common Repair
One of the most common issues I’ve faced on the trail is a flat tire. Whether it's from sharp rocks, thorns, or just general wear and tear, a flat tire can quickly derail a ride if you don’t know how to fix it. Luckily, this is a simple repair that can be done in just a few minutes with the right tools. Here’s what you’ll need:
- Replacement tube (or patch kit if you prefer to patch up the existing tube)
- Tire levers
- Mini pump or CO2 inflator
- Wrench (if your bike has quick-release axles, you may not need this)
Step 1: Remove the Wheel
The first step is to remove the wheel from the bike. If your bike has quick-release axles, this is simple—just undo the lever and slide the wheel out. If it’s a bolt-on axle, use a wrench to remove it. Once the wheel is free, place it on the ground and make sure the valve of the tire is facing upward so it’s easy to access.
Bicycle Barn LLC
839 Reading Rd, East Earl, PA 17519, USA
Step 2: Remove the Tire
Next, use the tire levers to pry the tire off the rim. Start by slipping one lever under the edge of the tire, then hook the other end of the lever to a spoke. Use a second lever to pry the rest of the tire off the rim, working your way around until the tire is completely removed.
Step 3: Replace or Patch the Tube
If you’re using a replacement tube, simply place it inside the tire and make sure it sits evenly around the rim. If you prefer patching the tube, apply a patch kit to seal the puncture. Just ensure that you’ve identified the exact location of the puncture first by inflating the tube slightly and listening for air escaping. Once patched, insert the tube back into the tire.
Step 4: Reinstall the Tire and Inflate
With the new or repaired tube in place, carefully reinstall the tire by pushing one side back onto the rim. Start at one end and work your way around the tire. Once both sides are on the rim, make sure the tube isn’t pinched. Inflate the tire to the recommended pressure, and you’re ready to go!
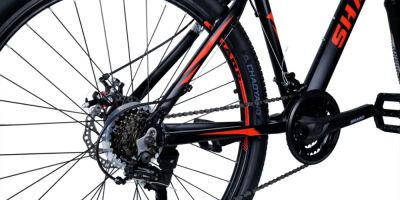
2. Adjusting the Gears: Ensuring Smooth Shifting
Another essential repair that every mountain biker should know is how to adjust their gears. When your gears aren’t shifting properly, it can make your ride uncomfortable and inefficient. Over time, cables stretch, and dirt and grime can accumulate in the drivetrain, causing issues with shifting. Luckily, adjusting the gears is relatively simple. Here’s how to do it:
Step 1: Check the Derailleur
Start by inspecting the rear derailleur to ensure it's not damaged or bent. If everything looks good, shift through the gears and observe if the derailleur is moving properly. If it’s struggling to move, you may need to adjust the tension on the derailleur cable.
Step 2: Adjust the Barrel Adjuster
The barrel adjuster is located where the derailleur cable connects to the bike frame. Turning the barrel adjuster clockwise tightens the cable and can help fix issues with shifting up to higher gears. Turning it counterclockwise loosens the cable and can fix issues with shifting down to lower gears. Small adjustments can make a big difference, so make tiny turns and test the shifting until it’s smooth.
Step 3: Fine-Tune the Limit Screws
The limit screws on your derailleur control how far the derailleur moves on either side of the cassette. If your bike’s chain keeps falling off the largest or smallest cog, you may need to adjust the limit screws. Turning the screws clockwise will stop the derailleur from moving too far toward the wheel, while counterclockwise adjustments will allow the derailleur to shift further.
With these simple adjustments, you can often fix poor shifting and ensure a smoother ride, whether you’re tackling hills or cruising along the trail.
3. Fixing Brake Issues: Ensuring Stopping Power
Good brakes are essential for any rider, especially when mountain biking on wet or rocky trails. Over time, brake pads wear down, or the brake cables may need adjustment. Here’s how to fix basic brake issues and restore your stopping power:
Step 1: Inspect the Brake Pads
Start by checking the brake pads to see if they are worn down. If the pads are thin or have grooves that are no longer visible, it’s time to replace them. Simply remove the caliper bolts and slide the old pads out. Replace with new pads, making sure they are aligned with the rim (for rim brakes) or rotor (for disc brakes).
Step 2: Adjust the Brake Cables
If your brakes feel loose or unresponsive, it may be due to slack in the brake cables. Use the barrel adjuster to tighten the cables and ensure the brake pads are making contact with the rim or rotor at the right time. If the adjustment doesn’t fix the issue, you may need to replace the cables entirely.
Step 3: Test the Brakes
Once you've adjusted the cables and replaced the brake pads, give the brakes a test run. Squeeze the levers to check for responsiveness. If they still feel weak, you may need to bleed the brakes (especially for hydraulic disc brakes) to remove air from the brake lines.
4. Maintaining Your Chain: Keeping Things Running Smoothly
One of the most neglected components of a mountain bike is the chain. Over time, dirt and grime can build up, causing the chain to become stiff, noisy, or even break. Regular cleaning and lubrication of your chain can keep things running smoothly. Here's how I take care of my chain:
Step 1: Clean the Chain
To clean your chain, use a degreaser and a chain cleaning tool to remove dirt and grease. Be sure to thoroughly clean the entire chain, especially the links. After cleaning, let the chain dry completely before lubricating it.
Step 2: Lubricate the Chain
Apply lubricant to the inside of the chain while slowly rotating the pedals backward. Once the chain is fully lubricated, wipe off any excess with a clean rag. Too much lubricant can attract more dirt and cause buildup, so a little goes a long way.
Step 3: Check for Chain Wear
Over time, the chain can stretch, which affects the performance of your gears. You can check for chain wear using a chain checker tool or by measuring the distance between the links. If the chain is stretched beyond a certain point, it’s time to replace it to avoid damaging the cassette and chainrings.
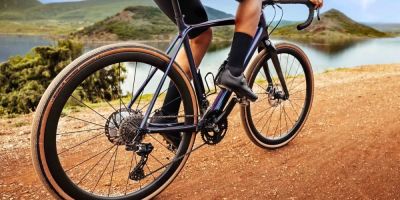
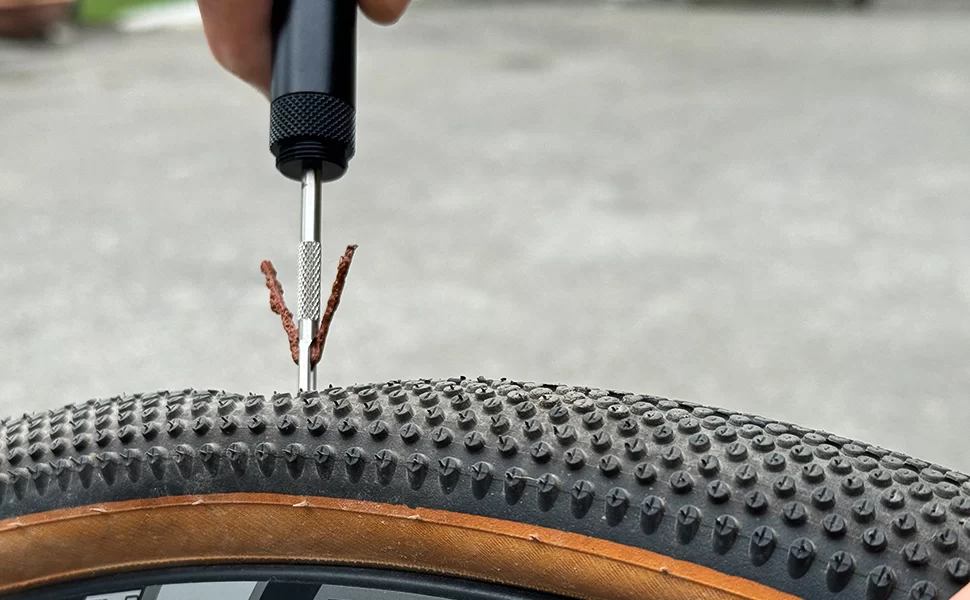
5. Tire Maintenance: Keeping Your Ride Smooth and Safe
Finally, let’s talk about tire maintenance. For a safe and smooth ride, it’s essential to keep your tires in good condition. From fixing punctures to adjusting tire pressure, proper tire care is an important part of bike maintenance.
Step 1: Check Tire Pressure
Before every ride, check the air pressure in your tires. Low pressure can cause poor traction and a sluggish ride, while too much pressure can lead to a harsh ride and increase the risk of punctures. A simple tire pressure gauge will help you maintain the correct PSI based on the type of trail and tire width.
Step 2: Inspect for Damage
Visually inspect your tires for any cuts, punctures, or embedded debris. If you find a small puncture, you can patch it with a tire patch kit. If the damage is significant, it might be time to replace the tire altogether.
By keeping your tires in good shape, you’ll ensure better grip, longer-lasting performance, and a more enjoyable ride on every trail.
If you need expert advice or the best gear for your bike, visit [Healthy Cycling] for top picks and recommendations on mountain bike maintenance products.