How to Effectively Repair a Flat Tire on Your Bike: A Complete Guide
Flat tires can be an annoying setback when you're cycling, especially when you're out on a ride and far from home. However, learning how to repair a flat tire on your bike is a valuable skill that can save you time, money, and frustration. In this guide, I’ll walk you through the steps to fix a flat tire, share my personal experience, and offer tips to ensure you're well-prepared the next time you're caught with a puncture on your bike.
Conte's Bike Shop
3449 Wilson Blvd, Arlington, VA 22201, USA
Understanding the Cause of a Flat Tire
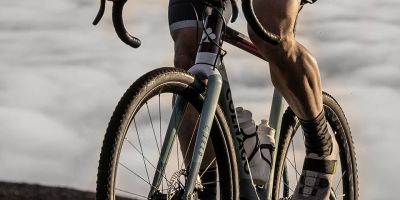
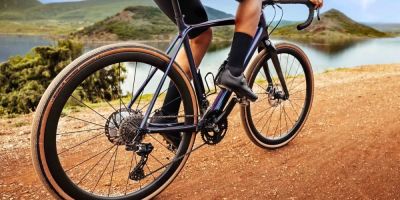
Before you dive into fixing a flat tire, it's important to understand what causes it in the first place. Most flat tires occur due to a puncture from sharp objects like nails, glass, or sharp stones. In some cases, a faulty valve or worn-out tire may also be to blame. My own experience with a flat tire happened during a weekend ride through a park. I was cruising along, enjoying the scenery, when I felt my bike lose speed. The tire had gone completely flat. I was stranded in the middle of nowhere, but luckily, I had my repair kit with me!
Bicycle Barn LLC
839 Reading Rd, East Earl, PA 17519, USA
What You’ll Need for the Repair
To effectively repair a flat tire on your bike, you’ll need a few tools and supplies. Here’s what I always keep in my repair kit:
- Spare Tube: It's always a good idea to carry a spare inner tube that matches your bike's tire size. I recommend choosing a high-quality tube to avoid frequent replacements.
- Tire Levers: These will help you remove the tire from the rim easily.
- Patch Kit: If you don’t have a spare tube, a patch kit can temporarily seal up the puncture until you can replace the tube.
- Bike Pump: A compact bike pump is essential for reinflating your tire once the repair is complete. It’s worth investing in a small, portable pump that fits in your bag.
- Multitool: A multitool with various bike-related tools can come in handy for more complex repairs.
Once you have your kit ready, you're good to go. Let's get into the step-by-step process of fixing your flat tire.
Step-by-Step Guide to Fixing a Flat Tire
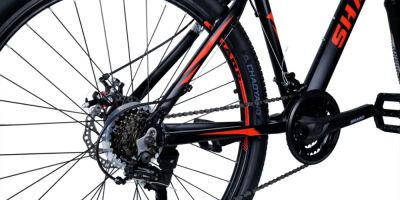
1. Remove the Wheel
To begin, you’ll need to remove the wheel from your bike. Depending on your bike's design, this can be a quick-release system or a bolt-on setup. I always start by flipping my bike upside down and releasing the brake, especially if you're dealing with rim brakes. For disc brakes, make sure not to pull the brake lever once the wheel is removed, as it could cause the brake pads to pinch together, making it harder to reinstall the wheel later.
2. Deflate the Tire Completely
If there’s any air left in the tire, you’ll need to release it completely. To do this, unscrew the valve cap and press the valve to let the air out. I always give it a little extra pressure just to ensure there’s no remaining air left in the tire, especially if I’m using a patch kit rather than a spare tube.
3. Remove the Tire from the Rim
Next, it’s time to remove the tire from the rim. I use a pair of tire levers for this. Insert one lever underneath the edge of the tire and hook it to a spoke. Then, use the second lever to pry the rest of the tire off the rim. This part can be tricky if the tire is tightly fitted, but applying some patience and care will make it easier.
Once one side of the tire is off, you can remove the inner tube. Check for any obvious punctures or damage to the tube. If it’s a small hole, you can use a patch kit, but if the damage is too large, a replacement tube is your best option.
4. Inspect the Inner Tube and Tire for Damage
Before inserting a new tube, inspect the tire itself for sharp objects that may still be stuck inside. I’ve had several times where I had to remove small pieces of glass or nails that caused the puncture. Run your fingers around the inside of the tire carefully and remove any debris. This step is crucial because leaving something sharp in the tire can cause another flat shortly after your repair.
5. Insert the New Tube
Now, it’s time to install the new tube. Start by slightly inflating the new tube to give it shape. This will prevent it from getting twisted or pinched during installation. Place the tube inside the tire, ensuring it sits evenly all the way around. Begin reinserting the tire onto the rim, starting from one side and working your way around. Be careful not to pinch the tube during this process, as this can also cause another flat.
6. Inflate the Tire
Once the tire is seated properly on the rim, it’s time to inflate it. I use my portable bike pump to inflate the tire to the recommended pressure (which is typically printed on the side of the tire). Make sure not to overinflate, as this can put unnecessary pressure on the tire and tube. Once it’s fully inflated, check the tire to make sure it’s seated evenly on the rim and that there are no bulges or leaks.
7. Reinstall the Wheel
With the tire now fully repaired, it’s time to put the wheel back on your bike. Make sure to align the wheel properly and tighten the quick release or bolts securely. Double-check that the brake pads are aligned correctly before you ride off. I always test my bike brakes before taking off to make sure everything is functioning properly.
Tips and Tricks for Preventing Flats in the Future
While it’s essential to know how to fix a flat, prevention is always better than a cure. Over the years, I’ve learned a few tricks to reduce the likelihood of getting a flat tire:
- Check Tire Pressure Regularly: Keeping your tire pressure at the right level helps prevent punctures caused by underinflation. I check mine before every ride.
- Use Puncture-Resistant Tires: These tires are designed with an additional layer to resist punctures. They’re a bit pricier, but they’re worth it if you ride on rough terrain frequently.
- Avoid Riding Over Debris: While you can't always avoid it, I try to steer clear of sharp objects like nails, glass, and rocks.
- Keep Your Tires Clean: I regularly clean my tires to remove any embedded debris that could cause damage later.
Having a flat tire doesn't have to ruin your day. With a little preparation and the right tools, you'll be back on the road in no time. Remember, the more you practice repairing a flat tire, the quicker and easier it will become. Stay safe, and happy cycling!