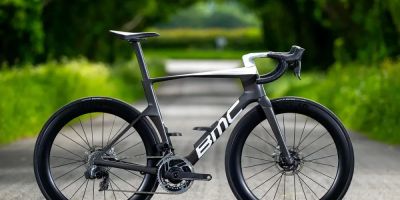
How to Set Up Your Bike for a Comfortable Ride
As an avid cyclist, one of the first things I learned early on was that a comfortable bike setup is crucial for a pleasant and enjoyable ride. I’ve had my fair share of uncomfortable cycling experiences, where I’d finish a ride with sore knees or a stiff back. After a few of those rides, I knew something needed to change. That's when I decided to focus on properly setting up my bike to make my rides as comfortable as possible.
Setting up your bike for comfort may seem like a simple task, but it’s an essential one if you plan on riding for long distances or just want to enjoy your cycling experience. Whether you're a beginner or an experienced rider, the proper adjustments can make a world of difference. In this article, I’ll walk you through the steps of setting up your bike for a comfortable ride and share some tips and tricks that I’ve learned over the years. Let’s get started!
Conte's Bike Shop
3449 Wilson Blvd, Arlington, VA 22201, USA
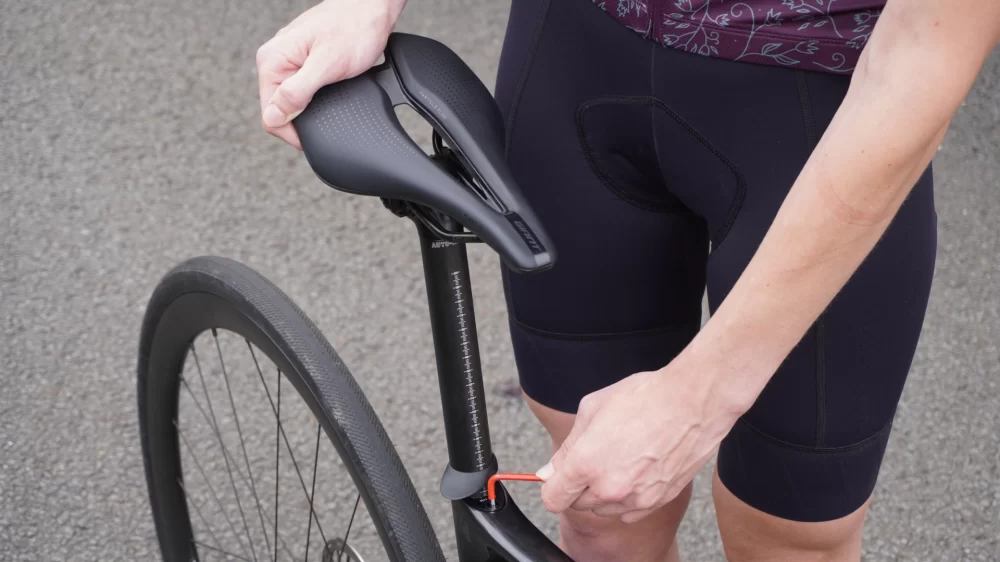
1. Adjusting the Saddle Height
When I first started cycling, I had no idea that saddle height could have such a significant impact on my comfort. My initial rides were often uncomfortable, with my knees aching after just a few miles. After doing some research and experimenting, I found that saddle height is one of the most crucial adjustments to get right.
The correct saddle height allows for a smooth pedal stroke, reduces strain on your knees, and helps prevent injuries. Here’s how I set up my saddle to the perfect height:

Bicycle Barn LLC
839 Reading Rd, East Earl, PA 17519, USA
1.1. Finding the Ideal Saddle Height
To find the right saddle height, I follow a simple method: I sit on my bike and place my heel on the pedal at the lowest point. My leg should be fully extended, with just a slight bend at the knee. If my knee is too straight or too bent, I adjust the saddle height until I find that sweet spot. Once I have the right height, my legs can complete the full pedal stroke without overextending, and my knees feel much better after a ride.
1.2. Avoiding Saddle Height Issues
Having your saddle too high or too low can lead to discomfort or even injury. If the saddle is too low, it can cause your knees to overextend, which leads to joint pain. On the other hand, if it’s too high, you’ll find yourself constantly overreaching, which can strain your hips and lower back. I’ve made these mistakes in the past, but now that I’ve learned how to adjust the saddle height correctly, it’s made all the difference in my rides.
2. Fine-Tuning Your Saddle Position
Once the saddle height is dialed in, it’s time to look at saddle position. Many cyclists overlook this adjustment, but it can play a big role in your comfort. The saddle’s fore-and-aft position, or how far forward or backward it sits, can affect your posture and pedaling efficiency.
2.1. Saddle Fore-Aft Adjustment
To adjust the saddle’s fore-and-aft position, I start by sitting on the saddle and looking at the position of my knees when the pedals are level. When the pedals are in a horizontal position, my forward knee should align roughly with the pedal axle. If my knee is too far forward, it can cause knee pain; if it’s too far back, I’ll feel awkward while pedaling. Adjusting the saddle forward or backward helps achieve this alignment and improves my comfort and efficiency.
2.2. Saddle Tilt Adjustment
I also make sure the saddle is level or has a slight tilt. If the saddle is tilted too far forward or backward, it can cause pressure on sensitive areas, leading to discomfort. I prefer my saddle to be level, but I adjust it slightly based on personal preference for a little extra comfort during long rides.
3. Handlebar Height and Reach
The next major adjustment I made to my bike setup was the handlebar height and reach. I’ve experienced back pain and shoulder strain from having the handlebars in the wrong position, so getting this right was essential for me.
3.1. Adjusting Handlebar Height
When setting up my handlebars, I focus on ensuring they are at a comfortable height for my body. I prefer my handlebars to be slightly higher than the saddle, as this promotes a more upright riding position, reducing strain on my back and neck. If the handlebars are too low, I tend to lean forward too much, which leads to discomfort during longer rides.
If your bike has an adjustable stem, you can raise or lower the handlebars by changing the stem angle or adjusting its length. I’ve found that a slightly higher handlebar position works best for me, providing a relaxed ride with less pressure on my wrists and back.
3.2. Handlebar Reach
Handlebar reach is the distance from the saddle to the handlebars. I’ve adjusted this to ensure I can comfortably reach the bars without overstretching my arms. To find the correct reach, I test different positions and make sure that my elbows have a slight bend when gripping the handlebars. If my arms are too stretched out, I start to feel discomfort in my shoulders and wrists, so I make sure the reach is just right for a relaxed and efficient riding posture.
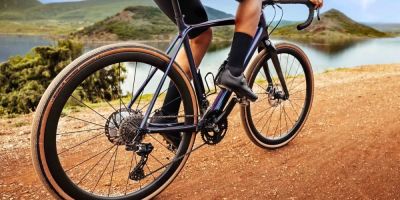
4. Tire Pressure and Bike Fit
The next aspect of bike comfort that I’ve paid more attention to over time is tire pressure. I didn’t realize it at first, but tire pressure plays a big role in how comfortable a ride is. If the tire pressure is too high or too low, it can cause a bumpy ride or reduce traction, making it harder to control the bike.
4.1. Setting the Right Tire Pressure
To find the right tire pressure, I check the recommended pressure range printed on the side of my tires. I make sure the pressure falls within this range. For my typical rides on smooth roads, I opt for a medium pressure, which provides a good balance between comfort and speed. On rougher terrains, I lower the pressure slightly to increase traction and absorb bumps more effectively.
4.2. Proper Fit for Maximum Comfort
Bike fit is an essential component of riding comfort, and it’s something I’ve spent a lot of time fine-tuning. A proper fit ensures that your bike is the right size for your body and helps prevent unnecessary strain on your joints and muscles. I’ve learned that getting a professional bike fitting can make a huge difference, but even small adjustments can improve the overall ride quality. Make sure your frame size, saddle, and handlebars are all suited to your body to ensure a more comfortable and efficient ride.
5. Additional Tips for Comfort During Rides
In addition to the above adjustments, there are a few other tips I’ve picked up along the way that have helped make my rides even more comfortable:
5.1. Invest in a Comfortable Saddle
The saddle is one of the most important parts of your bike when it comes to comfort. Over the years, I’ve tried several different saddles, and I’ve learned that the right saddle makes a huge difference. Choose one that fits your riding style and body. For long rides, a well-padded saddle with a cut-out design helps reduce pressure on sensitive areas.
5.2. Wear Proper Cycling Clothing
Wearing the right cycling clothes is another key factor in comfort. I always wear padded cycling shorts for extra cushioning, which helps prevent soreness. Breathable jerseys and moisture-wicking fabric also make my rides more comfortable, especially on warm days.
Setting up your bike for comfort takes a bit of time and effort, but it’s well worth it. With these adjustments, I’ve noticed significant improvements in my cycling experience, from longer rides to more enjoyable commutes. Whether you're a seasoned rider or just starting out, taking the time to fine-tune your bike setup can make all the difference. Happy cycling!